Hmmf!....I was thinking that I might be chucking the job in around the end of August.
Still going!
It is Xmas holidays and I have come to the end of my project, for the past week working about 2-3 hours per day doing tidy up stuff. These are my previous sins deciding to come back and bite me. Like getting quantities wrong. Like leaving off dimensions. Like using old filenames as fodder for new filenames. Fine, if you choose the right filename, but can be very confusing if you pick the wrong one.
I suppose old dogs can learn something with that. Probably not. More like overdosing on piping drawings.
One thing that I have found is that an outside supplier might send you a cad file of their plant for you to put into your drawing. Nice, except the only thing Autocad wants to snap to is endpoints, because the whole damn thing is parasolids or surfaces. Combine this with their idiotic preference for downloading things like motors that have all the silly fins on the motor and you have drafting that should be straight forward becomes a painful chore.
Luckily, on my job I was able to make time to replace such stupidity with much simpler shapes. So in the end my work computer T1000 graphics and 32MB ram coped ok with what ended up quite a large model. I did get nervous towards the end as I added yet more pipe supports though.
One of my coworkers seems not quite so lucky as the other job he is on has large plants from suppliers to insert, which are not quite so easy to thin down. This leads to long load times, and lack of responsiveness. This has led some to question: are we on the right track using Autocad? Would say Inventor or Solidworks or Catia or Microstation or Revit be a better option for working on large projects?
The only one of those I have experience with is Revit, although not in the context of using the piping option.
Personally, I believe Autocad, combined with parallel usage of Navisworks is the way to go.
One of my friends has experience with Inventor and claims he finds Autocad easier to think in.
That does not mean Autocad is the perfect solution, but I suspect a little work at the start of the project would mean things would go a lot smoother.
To do this, suppose I get a plant drawing from a supplier called PlantfromHell. All you need to do is create the dwg file called PlantfromHell.dwg, and the first thing to do would be to save it in a folder labelled PlantfromHellComplex. Then do a save as into a folder called PlantfromHellSimple, with THE SAME FILE NAME!
In the simple one, identify all the items that actually interface with the rest of the factory. Delete all the rest of the junk and replace with a simple box. Your file size is now bugger all!
Now xref your simple drawing into your main drawing. Life is good! When the sales guys and people with unrealistic expectations start to complain, all you have to do is change the path on the xref to the complex one. Oh joy! Sit back get cups of coffee, sit back and listen to Vivaldi's four seasons or Tracey Grammer and zone out.
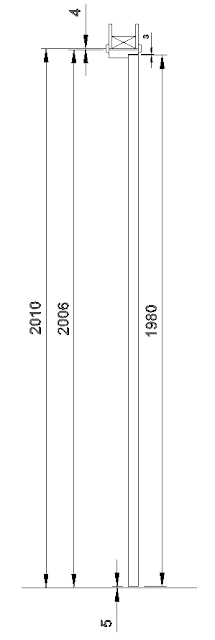
Another thing vital to know before starting is short radius bends or long?
A thing I wished I had going before I started was means of quickly inserting things like:Triclover ferrules, Pipe Supports, non return valves, and manual valves, all for use with diary piping. Towards the end of the project I created such a routine, along with simplified blocks and this made life a lot easier. I will post a demo of this on my Youtube channel, BIlrocad, it I can muster enough enthusiasm.
In case you feel inspired, here is the dcl file, followed by the lsp file. The blocks you will have to make yourself (if you are in this game, you will likely have these anyway).
Apologies for the mad ways of writing the lisp, but hey it works!
You would have to change the path for the blocks to your preference.
//Bilro Systems pipe VARIABLES SETTER
triclover1 : dialog {
aspect_ratio = 0;
label = "Dairy Pipe Items Inserter";
:row{
:radio_column {
key = "FERRULESIZE";
:text {label = "Ferrules";}
:radio_button {
key = "25.4";
label = "25.4";
}
:radio_button {
key = "38.1";
label = "38.1";
}
:radio_button {
key = "50.8";
label = "50.8";
}
:radio_button {
key = "63.5";
label = "63.5";
}
:radio_button {
key = "76.2";
label = "76.2";
}
:radio_button {
key = "101.6";
label = "101.6";
}
:radio_button {
key = "152.4";
label = "152.4";
}
}
:radio_column {
key = "MANUALVALVES";
:text {label = "Manual Valves";}
:radio_button {
key = "12.7 MV";
label = "12.7 MV";
}
:radio_button {
key = "19.0 MV";
label = "19.0 MV";
}
:radio_button {
key = "25.4 MV";
label = "25.4 MV";
}
:radio_button {
key = "38.1 MV";
label = "38.1 MV";
}
:radio_button {
key = "50.8 MV";
label = "50.8 MV";
}
:radio_button {
key = "63.5 MV";
label = "63.5 MV";
}
:radio_button {
key = "76.2 MV";
label = "76.2 MV";
}
:radio_button {
key = "101.6 MV";
label = "101.6 MV";
}
:radio_button {
key = "152.4 MV";
label = "152.4 MV";
}
}
:radio_column {
key = "CHECK VALVES";
:text {label = "Check Valves";}
:radio_button {
key = "12.7 CV";
label = "12.7 CV";
}
:radio_button {
key = "19.0 CV";
label = "19.0 CV";
}
:radio_button {
key = "25.4 CV";
label = "25.4 CV";
}
:radio_button {
key = "38.1 CV";
label = "38.1 CV";
}
:radio_button {
key = "50.8 CV";
label = "50.8 CV";
}
:radio_button {
key = "63.5 CV";
label = "63.5 CV";
}
:radio_button {
key = "76.2 CV";
label = "76.2 CV";
}
:radio_button {
key = "101.6 CV";
label = "101.6 CV";
}
:radio_button {
key = "152.4 CV";
label = "152.4 CV";
}
}
:radio_column {
key = "PIPE SUPPORTS";
:text {label = "Pipe Supports";}
:radio_button {
key = "12.7 PS";
label = "12.7 PS";
}
:radio_button {
key = "19.0 PS";
label = "19.0 PS";
}
:radio_button {
key = "25.4 PS";
label = "25.4 PS";
}
:radio_button {
key = "38.1 PS";
label = "38.1 PS";
}
:radio_button {
key = "50.8 PS";
label = "50.8 PS";
}
:radio_button {
key = "63.5 PS";
label = "63.5 PS";
}
:radio_button {
key = "76.2 PS";
label = "76.2 PS";
}
:radio_button {
key = "101.6 PS";
label = "101.6 PS";
}
:radio_button {
key = "152.4 PS";
label = "152.4 PS";
}
}
}
ok_cancel;
}
That was the DCL file, now here is the lsp file:
;Program written by Bill Le Couteur
;Auckland NZ
;Rev 0 date 22/9/24
(defun c:triclover1( / )
(setvar "CMDECHO" 0)
(setq dcl_id (load_dialog "c:/bilro/piping/triclover/triclover1.dcl"))
(if (not (new_dialog "triclover1" dcl_id))
(exit)
)
(action_tile "FERRULESIZE" "(pick_SIZE $value)")
(action_tile "MANUALVALVES" "(pick_SIZE $value)")
(action_tile "CHECK VALVES" "(pick_SIZE $value)")
(action_tile "PIPE SUPPORTS" "(pick_SIZE $value)")
(defun pick_SIZE (which)
(cond
((= which "12.7") (setq show_which 0))
((= which "15.9") (setq show_which 1))
((= which "19") (setq show_which 2))
((= which "25.4") (setq show_which 3))
((= which "31.8") (setq show_which 4))
((= which "38.1") (setq show_which 5))
((= which "50.8") (setq show_which 7))
((= which "63.5") (setq show_which 8))
((= which "76.2") (setq show_which 9))
((= which "101.6") (setq show_which 10))
((= which "152.4") (setq show_which 12))
((= which "12.7 MV") (setq show_which 13))
((= which "19.0 MV") (setq show_which 14))
((= which "25.4 MV") (setq show_which 15))
((= which "38.1 MV") (setq show_which 16))
((= which "50.8 MV") (setq show_which 17))
((= which "63.5 MV") (setq show_which 18))
((= which "76.2 MV") (setq show_which 19))
((= which "101.6 MV") (setq show_which 20))
((= which "152.4 MV") (setq show_which 21))
((= which "12.7 CV") (setq show_which 22))
((= which "19.0 CV") (setq show_which 23))
((= which "25.4 CV") (setq show_which 24))
((= which "38.1 CV") (setq show_which 25))
((= which "50.8 CV") (setq show_which 26))
((= which "63.5 CV") (setq show_which 27))
((= which "76.2 CV") (setq show_which 28))
((= which "101.6 CV") (setq show_which 29))
((= which "152.4 CV") (setq show_which 30))
((= which "12.7 PS") (setq show_which 31))
((= which "19.0 PS") (setq show_which 32))
((= which "25.4 PS") (setq show_which 33))
((= which "38.1 PS") (setq show_which 34))
((= which "50.8 PS") (setq show_which 35))
((= which "63.5 PS") (setq show_which 36))
((= which "76.2 PS") (setq show_which 37))
((= which "101.6 PS") (setq show_which 38))
((= which "152.4 PS") (setq show_which 39))
; ((= which "INPUT_SIZE") (setq show_which 30))
)
);end of defun pick_size
(action_tile "accept" "(done_dialog)")
(action_tile "cancel" "(done_dialog)")
(start_dialog)
(unload_dialog dcl_id)
(cond
((= show_which 3) (command "-insert" "C:/Bilro/Piping/Triclover/Triclover Fittings/1 inch Triclover Ferrule 21.5.dwg" pause "1" "1" pause))
((= show_which 4) (command "-insert" "C:/Bilro/Piping/Triclover/Triclover Fittings/1.25 inch Triclover Ferrule 21.5.dwg" pause "1" "1" pause))
((= show_which 5) (command "-insert" "C:/Bilro/Piping/Triclover/Triclover Fittings/1 and half inch Triclover Ferrule 21.5.dwg" pause "1" "1" pause))
((= show_which 7) (command "-insert" "C:/Bilro/Piping/Triclover/Triclover Fittings/2 inch Triclover Ferrule 21.5.dwg" pause "1" "1" pause))
((= show_which 8) (command "-insert" "C:/Bilro/Piping/Triclover/Triclover Fittings/2 and half inch Triclover Ferrule 21.5.dwg" pause "1" "1" pause))
((= show_which 9) (command "-insert" "C:/Bilro/Piping/Triclover/Triclover Fittings/3 inch Triclover Ferrule 21.5.dwg" pause "1" "1" pause))
((= show_which 10) (command "-insert" "C:/Bilro/Piping/Triclover/Triclover Fittings/4 inch Triclover Ferrule 21.5.dwg" pause "1" "1" pause))
((= show_which 12) (command "-insert" "C:/Bilro/Piping/Triclover/Triclover Fittings/6 inch Triclover Ferrule 21.5.dwg" pause "1" "1" pause))
((= show_which 13) (command "-insert" "C:/Bilro/Piping/Triclover/Manual Valves/0.5 inch Manual Ball Valve.dwg" pause "1" "1" pause))
((= show_which 14) (command "-insert" "C:/Bilro/Piping/Triclover/Manual Valves/0.75 inch Manual Ball Valve.dwg" pause "1" "1" pause))
((= show_which 15) (command "-insert" "C:/Bilro/Piping/Triclover/Manual Valves/1 inch Manual Ball Valve.dwg" pause "1" "1" pause))
((= show_which 16) (command "-insert" "C:/Bilro/Piping/Triclover/Manual Valves/1.5 inch Manual Ball Valve.dwg" pause "1" "1" pause))
((= show_which 17) (command "-insert" "C:/Bilro/Piping/Triclover/Manual Valves/2 inch Manual Ball Valve.dwg" pause "1" "1" pause))
((= show_which 18) (command "-insert" "C:/Bilro/Piping/Triclover/Manual Valves/2 and half inch Manual Ball Valve.dwg" pause "1" "1" pause))
((= show_which 19) (command "-insert" "C:/Bilro/Piping/Triclover/Manual Valves/3 inch Manual Ball Valve.dwg" pause "1" "1" pause))
((= show_which 20) (command "-insert" "C:/Bilro/Piping/Triclover/Manual Valves/4 inch Manual Ball Valve.dwg" pause "1" "1" pause))
((= show_which 21) (command "-insert" "C:/Bilro/Piping/Triclover/Manual Valves/6 inch Manual Ball Valve.dwg" pause "1" "1" pause))
((= show_which 22) (command "-insert" "C:/Bilro/Piping/Triclover/Check Valves/0.5 inch Check Valve.dwg" pause "1" "1" pause))
((= show_which 23) (command "-insert" "C:/Bilro/Piping/Triclover/Check Valves/0.75 inch Check Valve.dwg" pause "1" "1" pause))
((= show_which 24) (command "-insert" "C:/Bilro/Piping/Triclover/Check Valves/1 inch Check Valve.dwg" pause "1" "1" pause))
((= show_which 25) (command "-insert" "C:/Bilro/Piping/Triclover/Check Valves/1.5 inch Check Valve.dwg" pause "1" "1" pause))
((= show_which 26) (command "-insert" "C:/Bilro/Piping/Triclover/Check Valves/2 inch Check Valve.dwg" pause "1" "1" pause))
((= show_which 27) (command "-insert" "C:/Bilro/Piping/Triclover/Check Valves/2 and half inch Check Valve.dwg" pause "1" "1" pause))
((= show_which 28) (command "-insert" "C:/Bilro/Piping/Triclover/Check Valves/3 inch Check Valve.dwg" pause "1" "1" pause))
((= show_which 29) (command "-insert" "C:/Bilro/Piping/Triclover/Check Valves/4 inch Check Valve.dwg" pause "1" "1" pause))
((= show_which 30) (command "-insert" "C:/Bilro/Piping/Triclover/Check Valves/6 inch Check Valve.dwg" pause "1" "1" pause))
((= show_which 31) (command "-insert" "C:/Bilro/Piping/Triclover/Pipe Supports/0.5 inch Pipe Support.dwg" pause "1" "1" pause))
((= show_which 32) (command "-insert" "C:/Bilro/Piping/Triclover/Pipe Supports/0.75 inch Pipe Support.dwg" pause "1" "1" pause))
((= show_which 33) (command "-insert" "C:/Bilro/Piping/Triclover/Pipe Supports/1 inch Pipe Support.dwg" pause "1" "1" pause))
((= show_which 34) (command "-insert" "C:/Bilro/Piping/Triclover/Pipe Supports/1.5 inch Pipe Support.dwg" pause "1" "1" pause))
((= show_which 35) (command "-insert" "C:/Bilro/Piping/Triclover/Pipe Supports/2 inch Pipe Support.dwg" pause "1" "1" pause))
((= show_which 36) (command "-insert" "C:/Bilro/Piping/Triclover/Pipe Supports/2 and half inch Pipe Support.dwg" pause "1" "1" pause))
((= show_which 37) (command "-insert" "C:/Bilro/Piping/Triclover/Pipe Supports/3 inch Pipe Support.dwg" pause "1" "1" pause))
((= show_which 38) (command "-insert" "C:/Bilro/Piping/Triclover/Pipe Supports/4 inch Pipe Support.dwg" pause "1" "1" pause))
((= show_which 39) (command "-insert" "C:/Bilro/Piping/Triclover/Pipe Supports/6 inch Pipe Support.dwg" pause "1" "1" pause))
);end cond
(print show_which)
(setvar "CMDECHO" 1)
(princ)
)