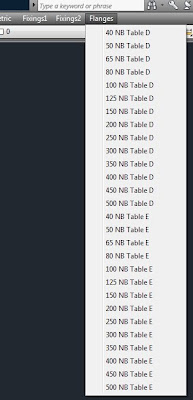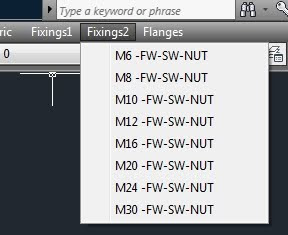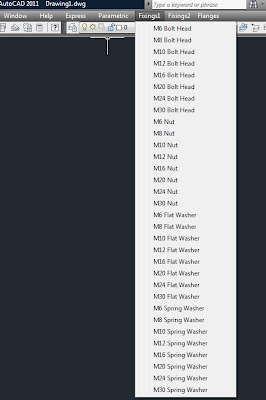

 I have often wondered why Autocad does not ship with useful stuff as shown above. Even if it was supplied as a .mnu file, then it would be a 5 minute task to have it up and running should user want it, without cluttering up a standard installation.
The obvious answer is that Autodesk has to look after all it's 3rd party add-on sellers. Just a commercial reality I suppose.
The Flanges just come in as a block. The Fixings1 items come in as individual bits. Fixings2 - they come in as "combos" ie a set of head, flat washer, spring washer, and nut.
To make one of these for yourself is not that hard.
Just fire up Notepad (Look under Start/Programs/Accessories)
and type in something like this:
***MENUGROUP=BILRO1
***POP13
[Fixings1]
[M6 Bolt Head] -insert;"C:/cad/library/3D/fixings/bolter/m6headb";\1;1;0;
Then save it as not a text file, but with a ".mnu" on the end so the file name ends up something like Bilro1.mnu.
The syntax looks a bit arcane, but just go with the flow.... You can see where the path is, and the block name (ie just another dwg file) is, and all the ;\1;1;0; is a shorthand way of saying:
enter,pause,use a scale factor of 1 for X,enter, scale factor of 1 for Y,enter,use a rotation of zero,enter.
To sum up:
; means enter
\means pause for user input
Then you have the fun of getting it into Autocad, so just:
1. Right click on any toolbar, and choose customise.
2. See the little round button with the arrow down the bottom? Hit it.
(There is someone in Autodesk that loves to hide things....)
3. Now pick the Transfer tab up the top.
4. Hit the 2nd button from the right, one that should give a tooltip of "open customisation file".
5.When the dialog comes up look down the bottom-it will say something like "...cuix" or "cui", so change this to legacy files-mnu, and hunt for your file.
Although Autocad does not tell you this, I believe (I can always be wrong!) that it converts it to a cui or cuix file as you open it.
6. On the right panel, expand the + next to "Menus". You should see your new headings there.
7. On the left panel, do the same. You should see the standard menu headings there.
8. Go back to the right panel, pick your first item, hold down shift to select all your items, then drag and drop to the left panel in the position you would like them to occupy.
9. Hit OK.
After some humming and whirring, you should have your menu additions!
As you can see, the Fixings and Flanges are most likely foreign to you as here in NZ we use British Standard Flanges usually.
Now comes the part I had a lot of hassle with: What happens if you get the path name wrong, and need to update it? You would think it should be straight forward, but I did not find it that logical.
How to do it:
Do the same actions as above, but stop at item 7. On the left panel, right click on the items you have added previously and choose "delete". Yes, you are sure! Then from the right panel drag your headings back onto the left panel as before.
I am going to add a few more bits and pieces, and then I hope to post the whole lot as a bundle on http://bilrocad.com/
No comments:
Post a Comment